

Webflow
Webflow
How to add Widg.io widgets to your Webflow website
How to add the Widg.io Element Script to your website
1.
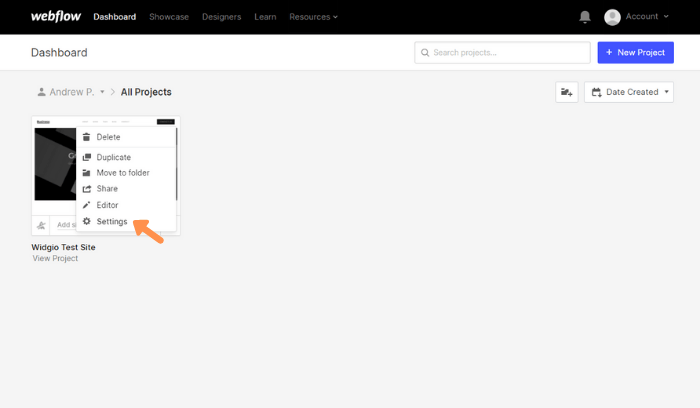
Log into your Webflow account, open the relevant website and visit Settings
2.
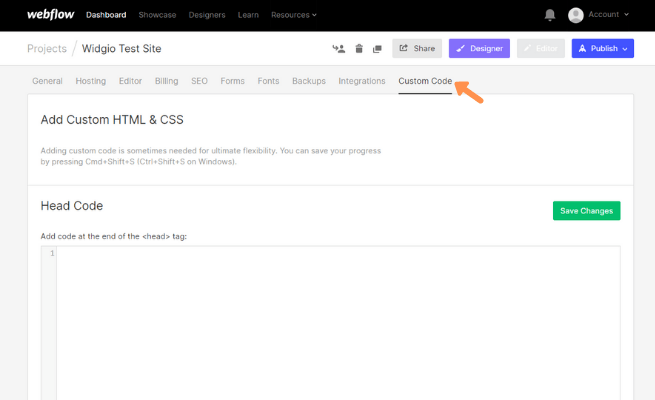
From the menu, select Custom Code

3.
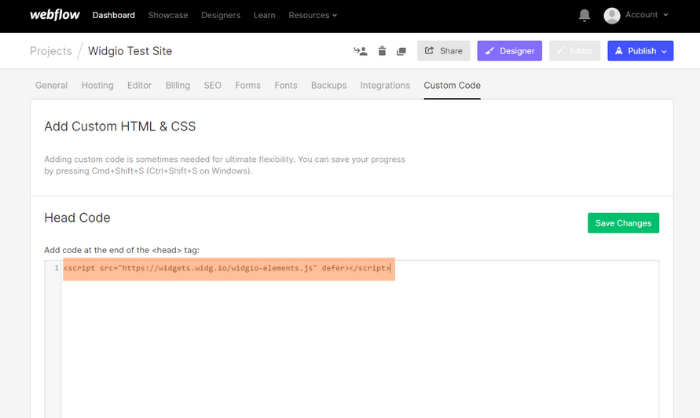
Copy the Widg.io Element Script and paste it into the Head Code section. Click Save Changes when done.
The Element Script has now been successfully added to your website.
How to add the Installation Code to make your widget appear on all pages
1.
Log into your Webflow account, open the relevant website and visit Settings

2.
From the menu, select Custom Code
3.
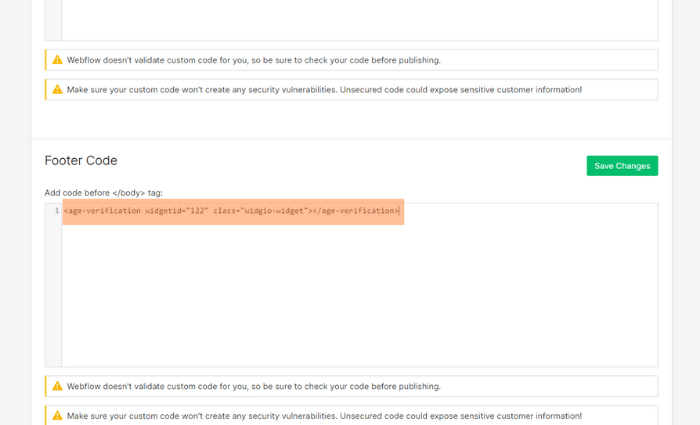
Copy the Widg.io Installation Code and paste it into the Footer Code section. Click Save Changes when done.
You have now successfully added the Installation Code to your website.
How to add the Installation Code to make your widget appear on one specific page
1.
Log into your Webflow account, open the Designer for the relevant website and navigate to relevant Page

2.
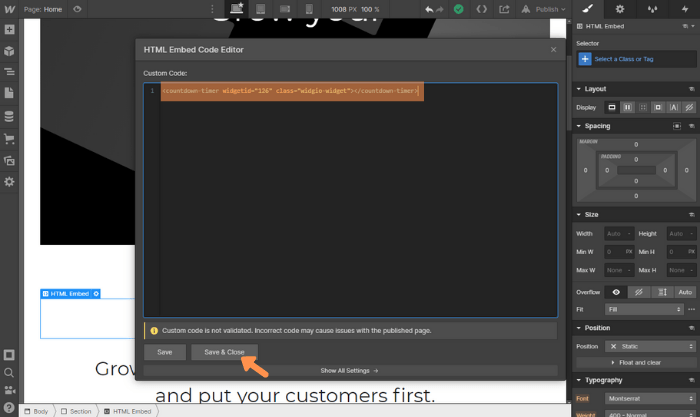
Select the + icon to add a new element, then select the Embed element and drag it to the desired position on the page

3.
Copy the Widg.io Installation Code and paste it into the HTML Embed Code Editor. Select Save & Close once completed.
After you publish your website, you will have successfully added the Installation Code to this page.