

Visual Composer
Visual Composer
How to add Widg.io widgets to your Wordpress website using Visual Composer
How to add the Widg.io Element Script to your website
1.
There are multiple ways to add the Element Script to your Wordpress Header section, but for simplicity, we're going to show you the easiest way, using a Header plugin.
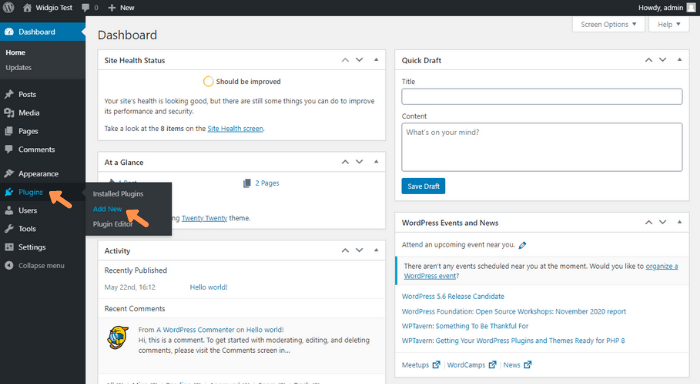
Log into the Wordpress editor for your website, and from the side menu click Plugins, then Add New
2.
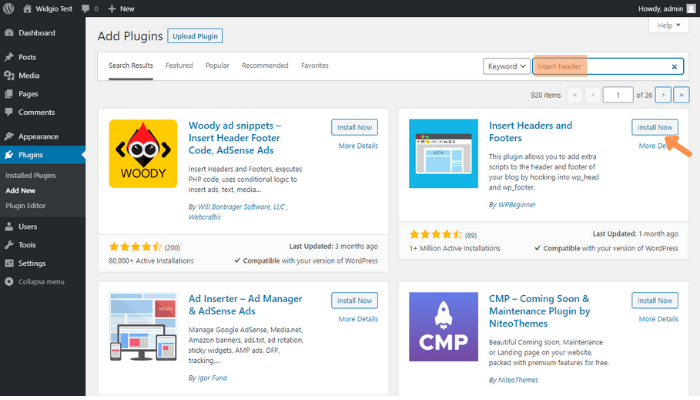
In the Search Box, type in "Insert Header" or similar to discover plugins that allow you to add custom scripts to your header. In this example we're using the Insert Headers and Footers plugin. Click the Install Now button and then click Activate after the plugin has downloaded.
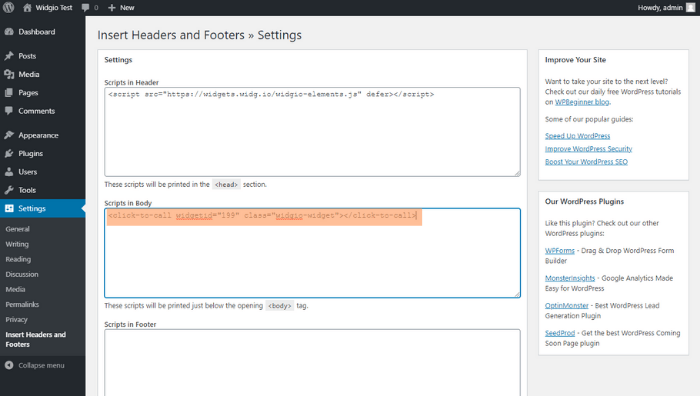
3.
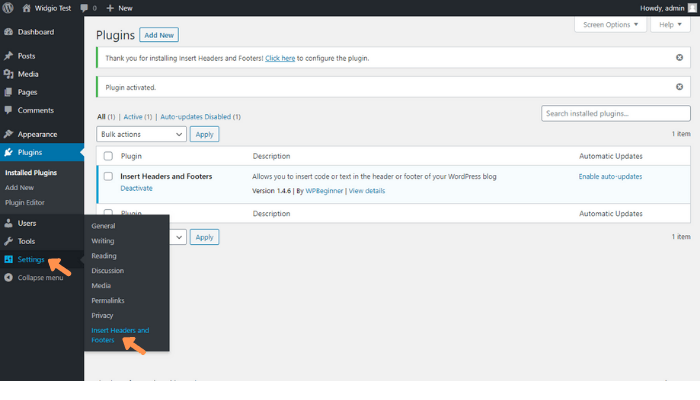
After the plugin has successfully activated, click Settings in the side menu and then Insert Headers and Footers

4.
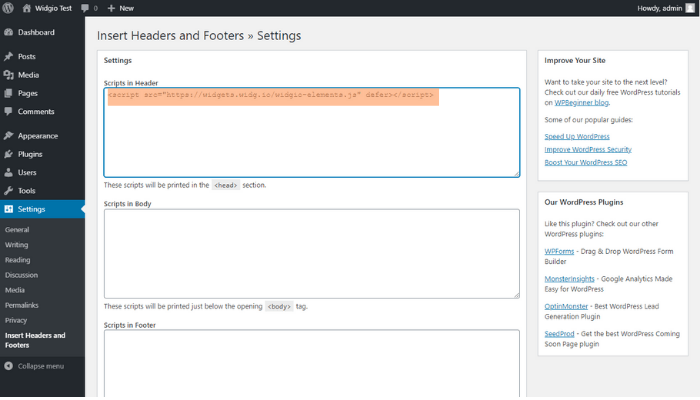
Copy the Widg.io Element Script and paste it into the Scripts in Header field. Click Save when done.
You have now successfully added the Widg.io Element Script into your Wordpress website.
How to add the Installation Code to make your widget appear on all pages
Please ensure you've followed the steps above before proceeding.
1.
Within the Wordpress editor for your website, click Settings in the side menu and then Insert Headers and Footers
2.
Copy the Widg.io Installation Code and paste it into the Scripts in Body field. Click Save when done.
You have now successfully added the Widg.io widget to your Wordpress website.
How to add the Installation Code to make your widget appear on one specific page
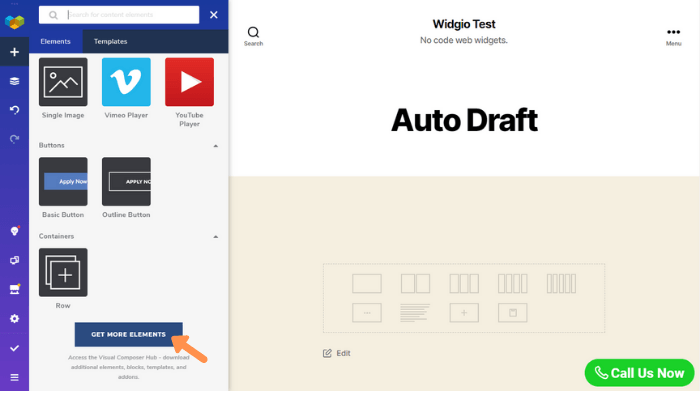
1.
Log into your Wordpress dashboard, open the page you want to add the widget to and from the side menu, click on Get More Elements
Note: You may need to activate your hub account to access additional functionality)
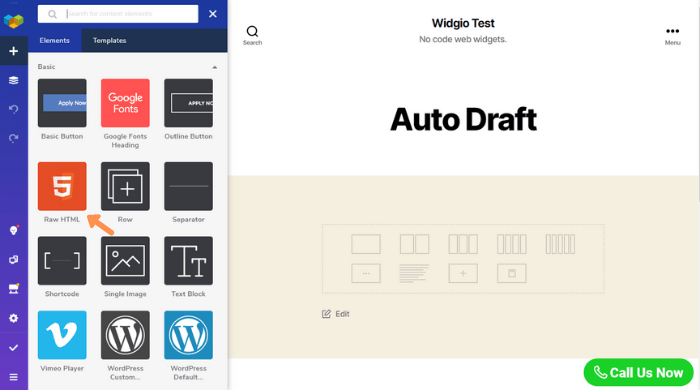
2.
In the search bar at the top of the screen, type in HTML. Then click on the Raw HTML icon that appears in the search results to install it to your Wordpress page builder.

3.
Return to the page builder in your Wordpress website, click on the Raw HTML icon and drag it to the desired position on the page.
4.
Copy the Widg.io Installation Code and paste it into the Raw HTML Code Editor. Click the "Check" icon to publish changes.
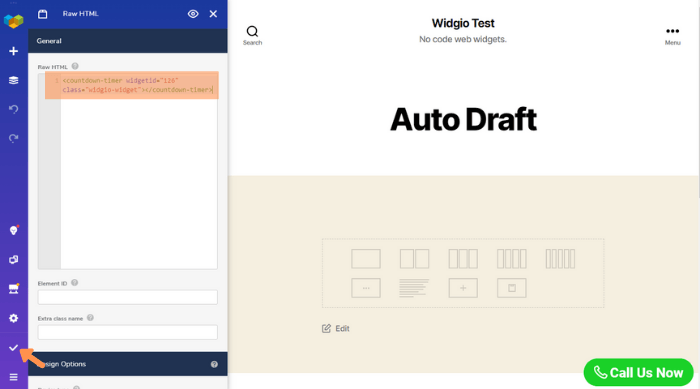
You have now successfully added the Installation Code to display on this page.